
2016 Feb 17
Beauty by Rosh
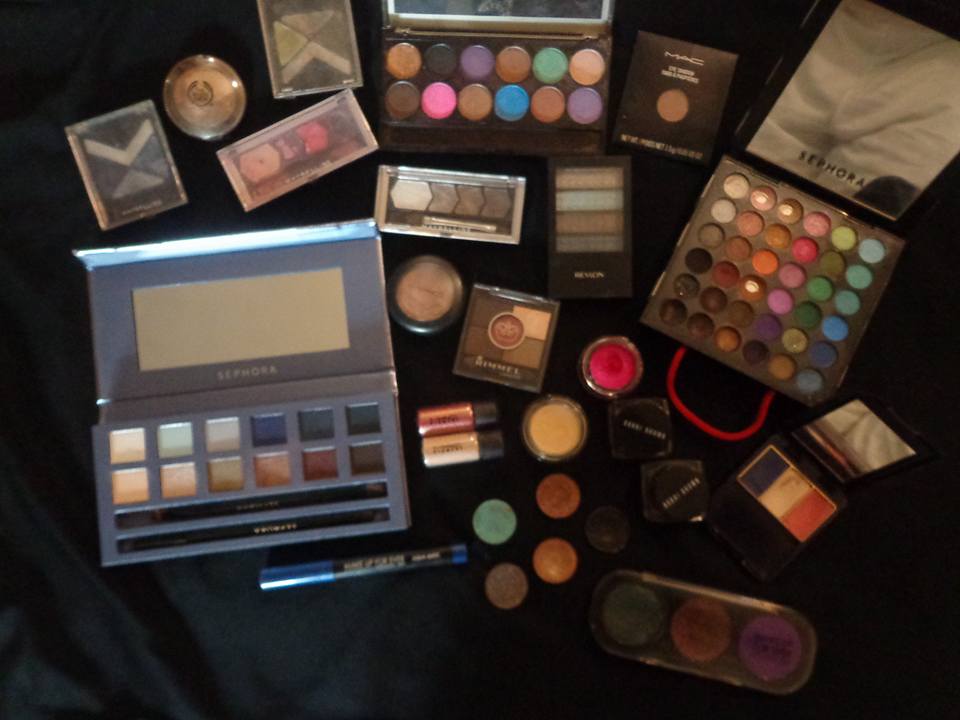
So we are always wondering what different coloured eye shadows should we put on our lids or even wondering what type of palette should we go out and buy. I mean there are so many palettes out there like the BH party girl palette to the Too Faced chocolate palette and even electric palettes and of course we all know the urban decay palettes! But this could be so confusing and you may no end up using half of these colours. So I’m gonna run down really simply what will help you when choosing the right eye shadow colour for you.
Cream shadows or powder shadows
Cream shadows are great as a base colour, but they are hard to blend sometimes and therefore I wouldn’t recommend putting them anywhere above the crease of your eye cause it will be difficult to work with (especially if it’s a dark cream shadow). Of course you need powder shadows in my opinion cause you can do much more with them. Only thing is that a cream shadow when put on the lid before your colour, can make such a huge difference. It really brings out the pigment in the shadow and also helps it to stay much longer. So that’s wat you need to know about cream vs powder as a beginner.
Matching skin tones
Us Sri Lankans have warm tones like olive/yellow/brown tones in our skin and it is slightly different choosing something for us than say an pale skin girl that has rosy undertones. I’ll put it this way- either way you need a transition colour –always! This is basic, and all of you need some transition colour that will help you blend any sort of eye shadow that you are working with. What is a transition colour; this could also be referred to as usually crease colour. it could be any basic brown, beige or orange (preferably matte) and this would usually go on your crease where usually you need to blend in the lid colour with the colour under your eye brows (I want to specify these are tips for a beginner). Lid colour– now here’s when you can play around. You can use an array of colours on your lid, as long as you make sure it doesn’t run over your crease if you’re a beginner cause otherwise it will be hard for you to works with later when your trying to blend. And this can make eye shadows turn out to be a real mess. Colours that I personally love and would recommend for our sin tones are the following; the obvious browns (let’s get that out of the way) you can use from deep browns to lighter browns may it be matte or even sheen or with sparkle; but remember you don’t always have to use brown shadows all the time though. Another great option for our skin tones are dark greens and blues– I know most of you must not wanna put those colours on your lids but I love a nice deep green (like an emerald green) on the lid really make your eyes pop if you have dark eyes. Blue also can give that nice pop of colour but make sure it stays on the lower part of your lid if you are a beginner. What I’d stay away from though is light blues & greens; these tend to make us look ghostly and pasty. I don’t like the end result when I use very light blue/green tones unless it’s a nice shimmery teal which I can work with a dark chocolate like brown and blend those two together. We can also use deep plums and purples– these can be really nice on our skin tones. But go for darker/muted purples which look beautiful on our skin. You can do a purple Smokey eye if you’re bored with your trusty brown/black smoked out look. I love using plum or purples shadows and there are a range of colours that you can match with it, like light pinks, any shade of brown, black and even a muted orange. When it comes to pink I’d stay away from it on your lid on it’s own, I would have another colour definitely blended in. It is very difficult to match the right pink for us – Id say go for a medium to light pink with blue undertones and it could be a nice crease or inner corner colour. And last of course Black! You can use black on your lid in different ways outer corners or full lid or just to darken you colour whichever way I love matte black shadows. Watch out for fall out with dark colours , usually I would do my eyes before I do my face makeup if I’m working with dark powder shadows. Inner corners of your eyes & brow bone now these two areas usually or almost never do you want to put dark colour on there. You always want to put a light colour to highlight this area. When you lighten the inner corners of your eyes you appear awake and your eyes appear bigger. And when it’s the brow bone too you wanna highlight cause that would give it a lifter look and will also help define you eye brows. You can use any light colour – lightest pinks and yellow tones, light beige, white or silver etc. but you don’t wanna go use a colour that far from your skin tone under your brows, just looks funny! Like a blue or purple or green, don’t put them on your brown bone. Stay with light earth tones in this area. I would say you don’t even need an eye shadow colour for this, you can just use your highlighter powder and it works much better even. Outer corners, I usefully love this area cause this I when I get to put a dark colour and smoke out my eyes. You can use any black, dark brown, dark plum or even a dark blue for this. And its pretty easy to figure out if you think in terms of darker than my lid colour.


Picking eye shadows as a beginner
So lets imagine for a second that you have no eye shadows in your makeup bag and this is your first ever eye shadow set or palette. Given the choice I’d say go with colours that are closer to your skin tones so that it’s easier to blend and to work with in general. For example if it’s your first couple of times attempting this then you don’t want to have put a bold colour like a fusia pink or a bright blue and then not know how to get out of the mess you created. So for a beginner I’d say all you need is 3 eye shadow colours, I repeat Three! So that’s great if you’re on a budget or if you’re worried you’ll waste money on buying colours you will never use.
So the three colours are 1. Lid | 2. Crease/transition colour | 3. Inner corner & brow bone. There you have it simple. Even for a pro pretty much this is what you have to think of, but of course you can even put 10 different colours and blend that all oh so beautifully. But this is for beginners and don’t worry with practice and time and more tutorials from me J you will get there and ‘blend like a pro!’. So if your still wondering what you can get I’d say got for a trio set from either MAKE UP FOR EVER or TOO FACED or TARTE if you’re looking for high end brands (these are super bendable and mainly pigmented) but you can go for some amazing drug store shadows from Maybelline or Rimmel or BH which are the 3 brands I’d recommend from the drug store brands cause the shadows in these brands are really creamy in texture and is very bendable. So your still wondering what should the 3 colours be, I’d say go for a dark colour with is about 5 shades darker than your skin tone for the lid (either a brown or a plum), and for your crease get a transition colour which should be 3 shades darker than your skin tone (you can use your contour powder for this if you don’t want to go get this colour). And for the inner corners/under the brows get a light beige colour or any colour that 3-5 shades lighter than you depending on the intensity you want.
If you’re a person already familiar with makeup and you’re going for a palette then I’d say go for a palette that has a load of earth tones and browns and mauves- these can come handy with many looks. Also look for a palette that gives you like 2-3 brighter / interesting colours that you can use on your lid. So to sum it up a palette that has a couple of browns + couple of mauve shades + one black shadow + a few light highlighter shadows in peach/beige + and that has 1 or more – purple/green/blue/plum. This would be the ideal palette. Quick tip: in many high end brands you can custom make a palette, you but the refill pans and put it on a palette you buy separately from them!
Hope this article helped you. If you want more articles like this please let us know on the comments below.
Beauty review by Rosh is a beauty, makeup and fashion blogger based in Sri Lanka but has a wide knowledge of international brands and trends. She is always up-to-date with her personal style and now she’s bringing you DIY ideas for you! She does DIY makeup looks & tutorial, fashion edits and of course beauty product reviews. Only having started Beauty review by Rosh this January 2016 it is already got the attention of many girls trying to not to spend too much money on stylists and salons. Her site is completely free and gives you access into the beauty world and helps you style yourself on your own.
You can check out DIY Make up tutorials by Rosh by clicking below or visit her page on fb www.fb.com/beautybyRosh. You can also follow her on Instagram @beautyreviewbyrosh


